SAFARI Montage Live!® Integration
For Users:
Overview
For districts with SAFARI Montage and SAFARI Montage Live! (SML), users can access and view published SML archived sessions directly from SAFARI Montage.
Note: The ability to play SAFARI Montage Live! sessions is based on permissions set by the conference organizer or system administrator.
Playing SAFARI Montage Live! Sessions
To play a SML session, do one of the following:
Option #1
- Log into SAFARI Montage.
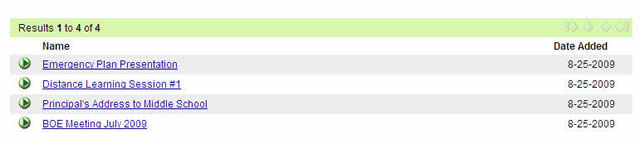
- Click on the 'SAFARI Montage Live! Archives' tab, on the Dashboard. The three most recently played sessions are listed.
- Click one of the SML sessions listed to begin playing. To view additional sessions, click the 'more »' link below the listed sessions.

Option #2
- Log into SAFARI Montage.
- Click on 'Modules' tab on the SAFARI Montage dashboard.
- Click on 'SAFARI Montage Live' on the left-hand navigation.
- Click on 'Archives' in the submenu of the left-hand navigation. All available archived sessions will be listed.
- Click one of the SML sessions listed to begin playing. To view additional sessions, click the 'Next / Previous' navigation located above the 'Date Added' column.
SAFARI Montage Live! Playback and Control
The following is a brief overview of the playback and control associated with playing a SAFARI Montage Live! session.
After the user has clicked a session link, the SML player will launch full-screen and is ready for viewing.
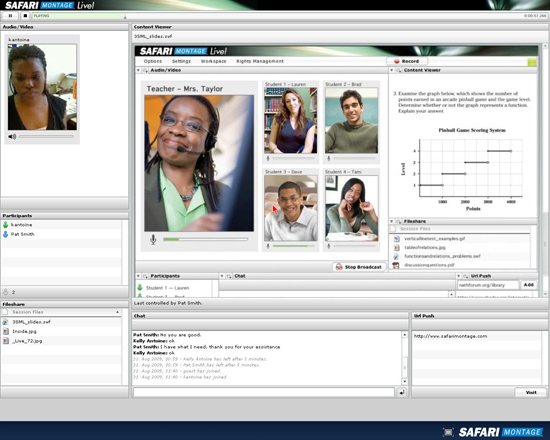
To begin playing the session, click the 'Play' button located in the top left of the player.

To pause, click the 'Play/Pause' button while the SML session is playing.
To stop, click the 'Stop' button located at the top left of the player next to the 'Play' button. To scrub playback, click and drag the playback head to a new play location along the timeline.

To switch playback from full-screen player to the in-browser player, click the 'Full-screen' (![]() ) button located at the bottom right of the player. To return to the full-screen player, click the full-screen button while in the in-browser player.
) button located at the bottom right of the player. To return to the full-screen player, click the full-screen button while in the in-browser player.
Note: Play, Pause and Stop functions the same in the in-browser player as they do in full-screen player.
For Administrators:
Overview
Administrators can:
- Configure SAFARI Montage Live! (SML) integration
- Add or remove archived sessions
- Assign permissions
Setting up SML in SAFARI Montage:
Note: To configure SML integration, the user must have administrator rights.
Adding a SML Server
To add a SML server, do the following:
- Log into SAFARI Montage as an Administrator.
- Click the 'Admin' tab on the SAFARI Montage dashboard.
- Click on 'SAFARI Montage Live!' on the left-hand navigation.
- Click on 'Servers' in the submenu of the left-hand navigation.
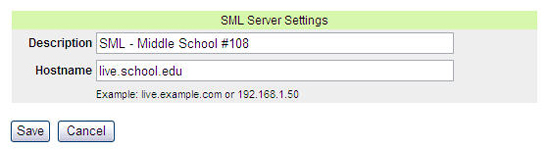
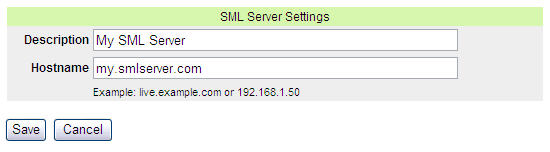
- Click on 'Add Server,' above the displayed server list to add a SML server.
- Enter a description and hostname, then click the 'Save' button.

Note: If the SAFARI Montage Live! server's software does not meet the minimum version requirements, the user will see the warning below.

Enabling/Disabling a SML Server
Note: Complete steps 1-4 from 'Adding a SML Server' to reach the list of SML servers.
To enable or disable a server, check (enable) or uncheck (disable) the checkbox next to the server.
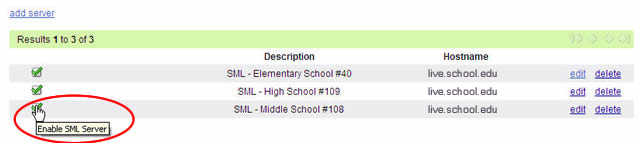
Edit or Deleting a SML Server
Note: Complete steps 1 - 4 from 'Adding a SML Server' to reach the list of SML servers.
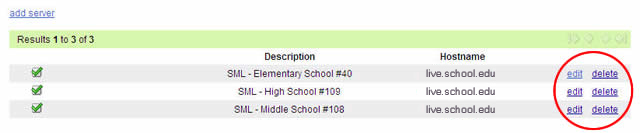
To delete a SML server, click the 'delete' link.
To edit a SML server, click the 'edit' link. Edit the server details and click 'Save.'
Adding a Recorded SML Session Automatically
To add a recorded SML session automatically, do the following:
- Log into SAFARI Montage as an Administrator.
- Click the 'Admin' tab on the SAFARI Montage dashboard.
- Click on 'SAFARI Montage Live!' on the left-hand navigation.
- Click on 'Archives' in the submenu of the left-hand navigation.
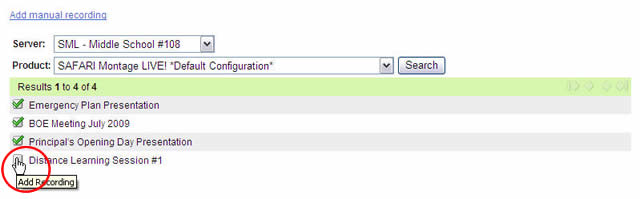
- Click on 'New Recorded Session,' located above the results list.
- Select a SML Product from the 'Product' drop-down box.
- Click the 'Search' button.
- Click the checkbox next to the SML archived sessions to add.
- Click the 'Continue' button to publish the session.

Note: If single sign-on fails for the enabled SML server, the user will be prompted to enter their SML credentials (ie.username and password) before continuing.
Note: If multiple SML servers are enabled, the user will have to choose a server before continuing.
Note: A 'Product' is defined as the session type used when recording a SAFARI Montage Live! session.

Note: Attendees associated with the SML archived session, SAFARI Montage will attempt to add authorized viewers automatically by matching the e-mail addresses of the sessions invitees stored in SML. To add or remove users, please see the 'Setting Permissions' section of this help page.

Adding a Recorded SML Session Manually
Manually adding archived sessions may be used to publish sessions organized by others.
To add a recorded SML session manually, do the following:
- Log into SAFARI Montage as an Administrator.
- Click the 'Admin' tab on the SAFARI Montage dashboard.
- Click on 'SAFARI Montage Live!' on the left-hand navigation.
- Click on 'Archives' in the submenu of the left-hand navigation.
- Click on 'New Recorded Session,' located above the results list.
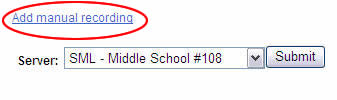
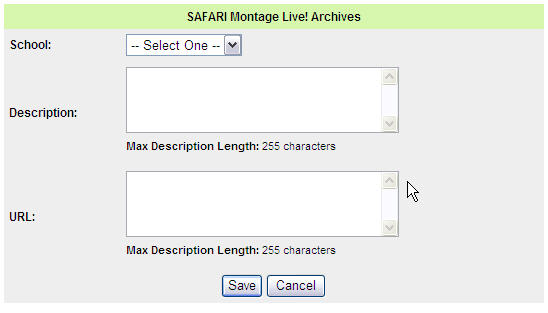
- Click 'Add manual recording.'
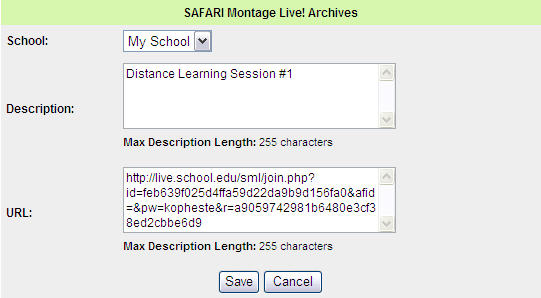
- Select a school, enter a description and paste the URL for the SML session. Click the 'Save' button to publish the session.
The recorded SML session is now available to all users. To refine who can view the archived session, see the 'Setting Permissions' section of this help page.
Edit or Deleting a Recorded SML Session
Note: Complete steps 1 - 4 from 'Add a Recorded SML Session' to reach the list of SML sessions.
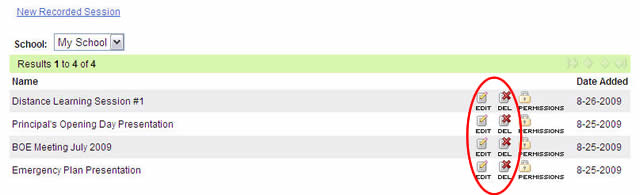
To delete a SML session, click the 'Del' (![]() ) icon next to the SML session.
) icon next to the SML session.
To edit a SML session, click the 'Edit' (![]() ) icon next to the SML session. Edit the session details and click 'Save'.
) icon next to the SML session. Edit the session details and click 'Save'.
Setting Permissions
There are three ways to define permissions to allow users to view archived SML sessions.
- All - Grants every user access to archived SML sessions.
- User Type - Grants users access to archived SML sessions based on user types.
- Users - Grants individual users accounts access to archived SML sessions.
To set the permissions for an archived SML session, from the SAFARI Montage Live! Archives list do the following:
- Log into SAFARI Montage as an Administrator.
- Click on 'Admin' on the SAFARI Montage header.
- Click on 'SAFARI Montage Live!'on the left-hand navigation.
- Click on 'Archives' on the sub-menu of the left-hand navigation.
- Click on the 'Permissions' (
 ) icon next to the archived SML session.
 - Select how to grant permissions by choosing a method from the 'Grant Permissions To' drop-down box.
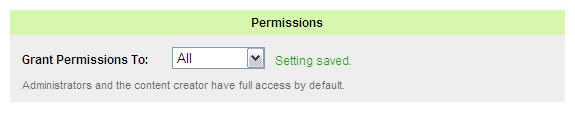
- To Grant Permission to All Users – Choose 'All' from the 'Grant Permissions To' drop-down box.
- To Grant Permission to Specific User Types – Choose 'User Types' from the 'Grant Permissions To' drop-down box.
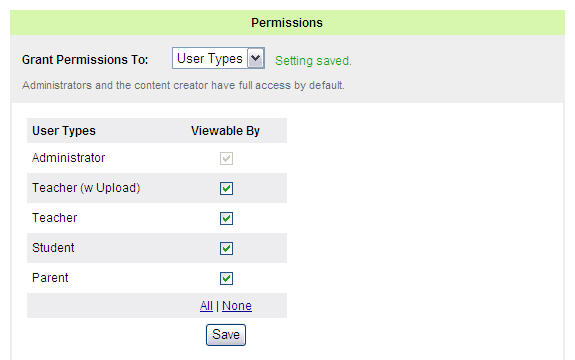
- Individually check (give permission) or uncheck (remove permission) for each User Type.
- Click the 'Save' button. Selected User Types now have permission to view the archived SML session.
- To Grant Permission to Individual Users - Choose 'Users' from the 'Grant Permissions To' drop-down box.
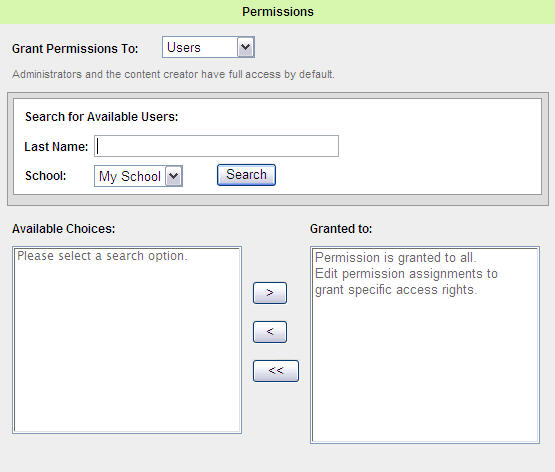
Note: By default, all users are granted permission to view archived SML sessions.
- Enter a users 'Last Name.'
Note: To display a list of all users available on the SAFARI Montage server, leave 'Last Name' blank. - Choose a school from the 'School' drop-down box to filter by school
- Click the 'Search' button.
- Click the name of the users from the 'Available Choices' list, and click the '>' button to grant permission. The user's name is transferred to the 'Granted to' list and immediately has permission to view the archived SML session.
Notes:- To select multiple users, hold down 'CTRL,' on the keyboard, and click each desired user name.
- As soon as a user is transferred from the 'Available Choices' list to the 'Granted to' list, only the listed users are granted access
- Enter a users 'Last Name.'
- To Grant Permission to Individual Users - Choose 'Users' from the 'Grant Permissions To' drop-down box.
- Highlight the user in the 'Granted to' list, and click the '<' button. The user's name is transferred to the 'Available Choices' list and no longer has permission to view the archived SML session.
Notes:- To select multiple users, hold down 'CTRL,' on the keyboard, and click each desired user name.
- To remove all users, click the '<<' button. All users are transferred to the 'Available Choices' box and the default condition of granting all users permission is now restored.
- Highlight the user in the 'Granted to' list, and click the '<' button. The user's name is transferred to the 'Available Choices' list and no longer has permission to view the archived SML session.
All user accounts now have permission to view the archived SML session.